ArduinoHUD [.NET] 3.0


![Persistence (Save Vehicles) [Enhanced]](https://img.gta5-mods.com/q75-w500-h333-cfill/images/persistence-save-vehicles-enchanced/1046e0-thumbnail1-re.png "Persistence (Save Vehicles) [Enhanced]")


2.823
129
2.823
129
ArduinoHUD turns your Arduino and LCD setup into an informational display that provides some data about your current gameplay.
Big thanks to ZyDevs for the inspiration and base sketch. Check out his script here.
Features
v3.0
v2.0
Installation
Known Issues
License
The source code is available on GitHub, feel free to use it in any way you want: https://github.com/5mods/ArduinoHUD
Big thanks to ZyDevs for the inspiration and base sketch. Check out his script here.
Features
v3.0
- Updated to use Script Hook V .NET v2.5.1. This is required, the script won't work without it.
- Fixed "BUSTED" display
- Refactored the way screens are cycled through, allowing for world/player information to display even while driving
- Added forced screen cycling via push button
- For help connecting your push button, use this tutorial: https://www.arduino.cc/en/tutorial/pushbutton
- Update the ArduinoHUD.ino sketch with your corresponding push button digital pin
- Update the ArduinoHUD.ini preferences file to set ToggleFormat to "ARDUINO" to disable the timed cycling
- For help connecting your push button, use this tutorial: https://www.arduino.cc/en/tutorial/pushbutton
v2.0
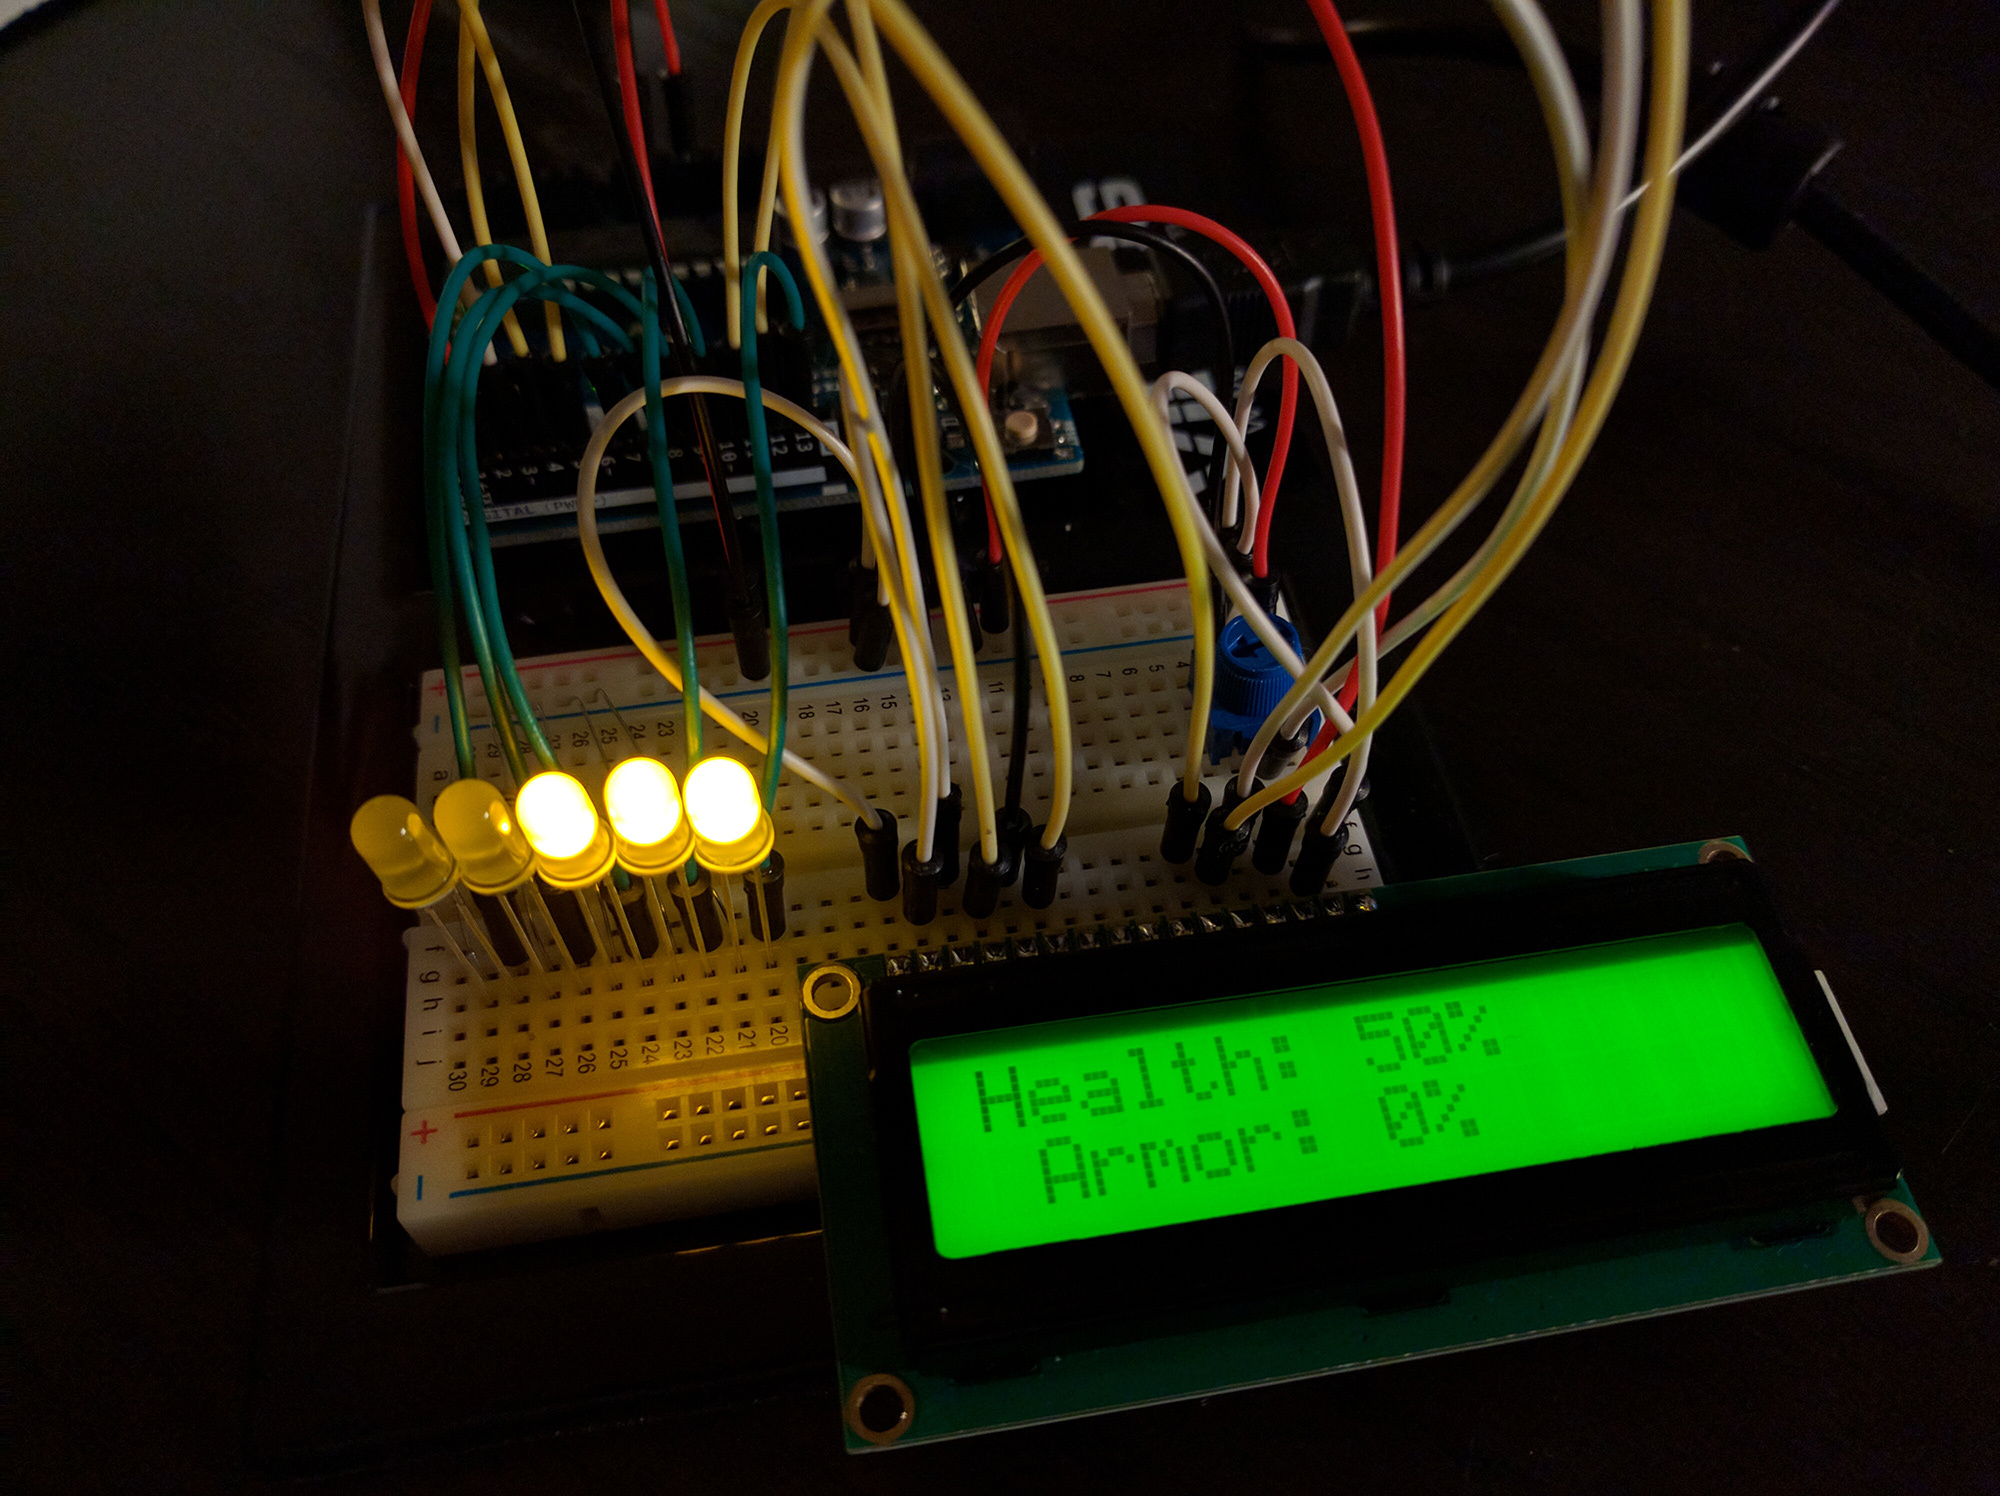
- Added wanted level display via five LEDs
- For help connecting your LEDs, use this tutorial: https://www.arduino.cc/en/Tutorial/Blink
- Update the ArduinoHUD.ino sketch with your corresponding LED digial pins (LED1_PIN should be the right-most LED)
- For help connecting your LEDs, use this tutorial: https://www.arduino.cc/en/Tutorial/Blink
- While walking
- Displays current time, weather and neighborhood
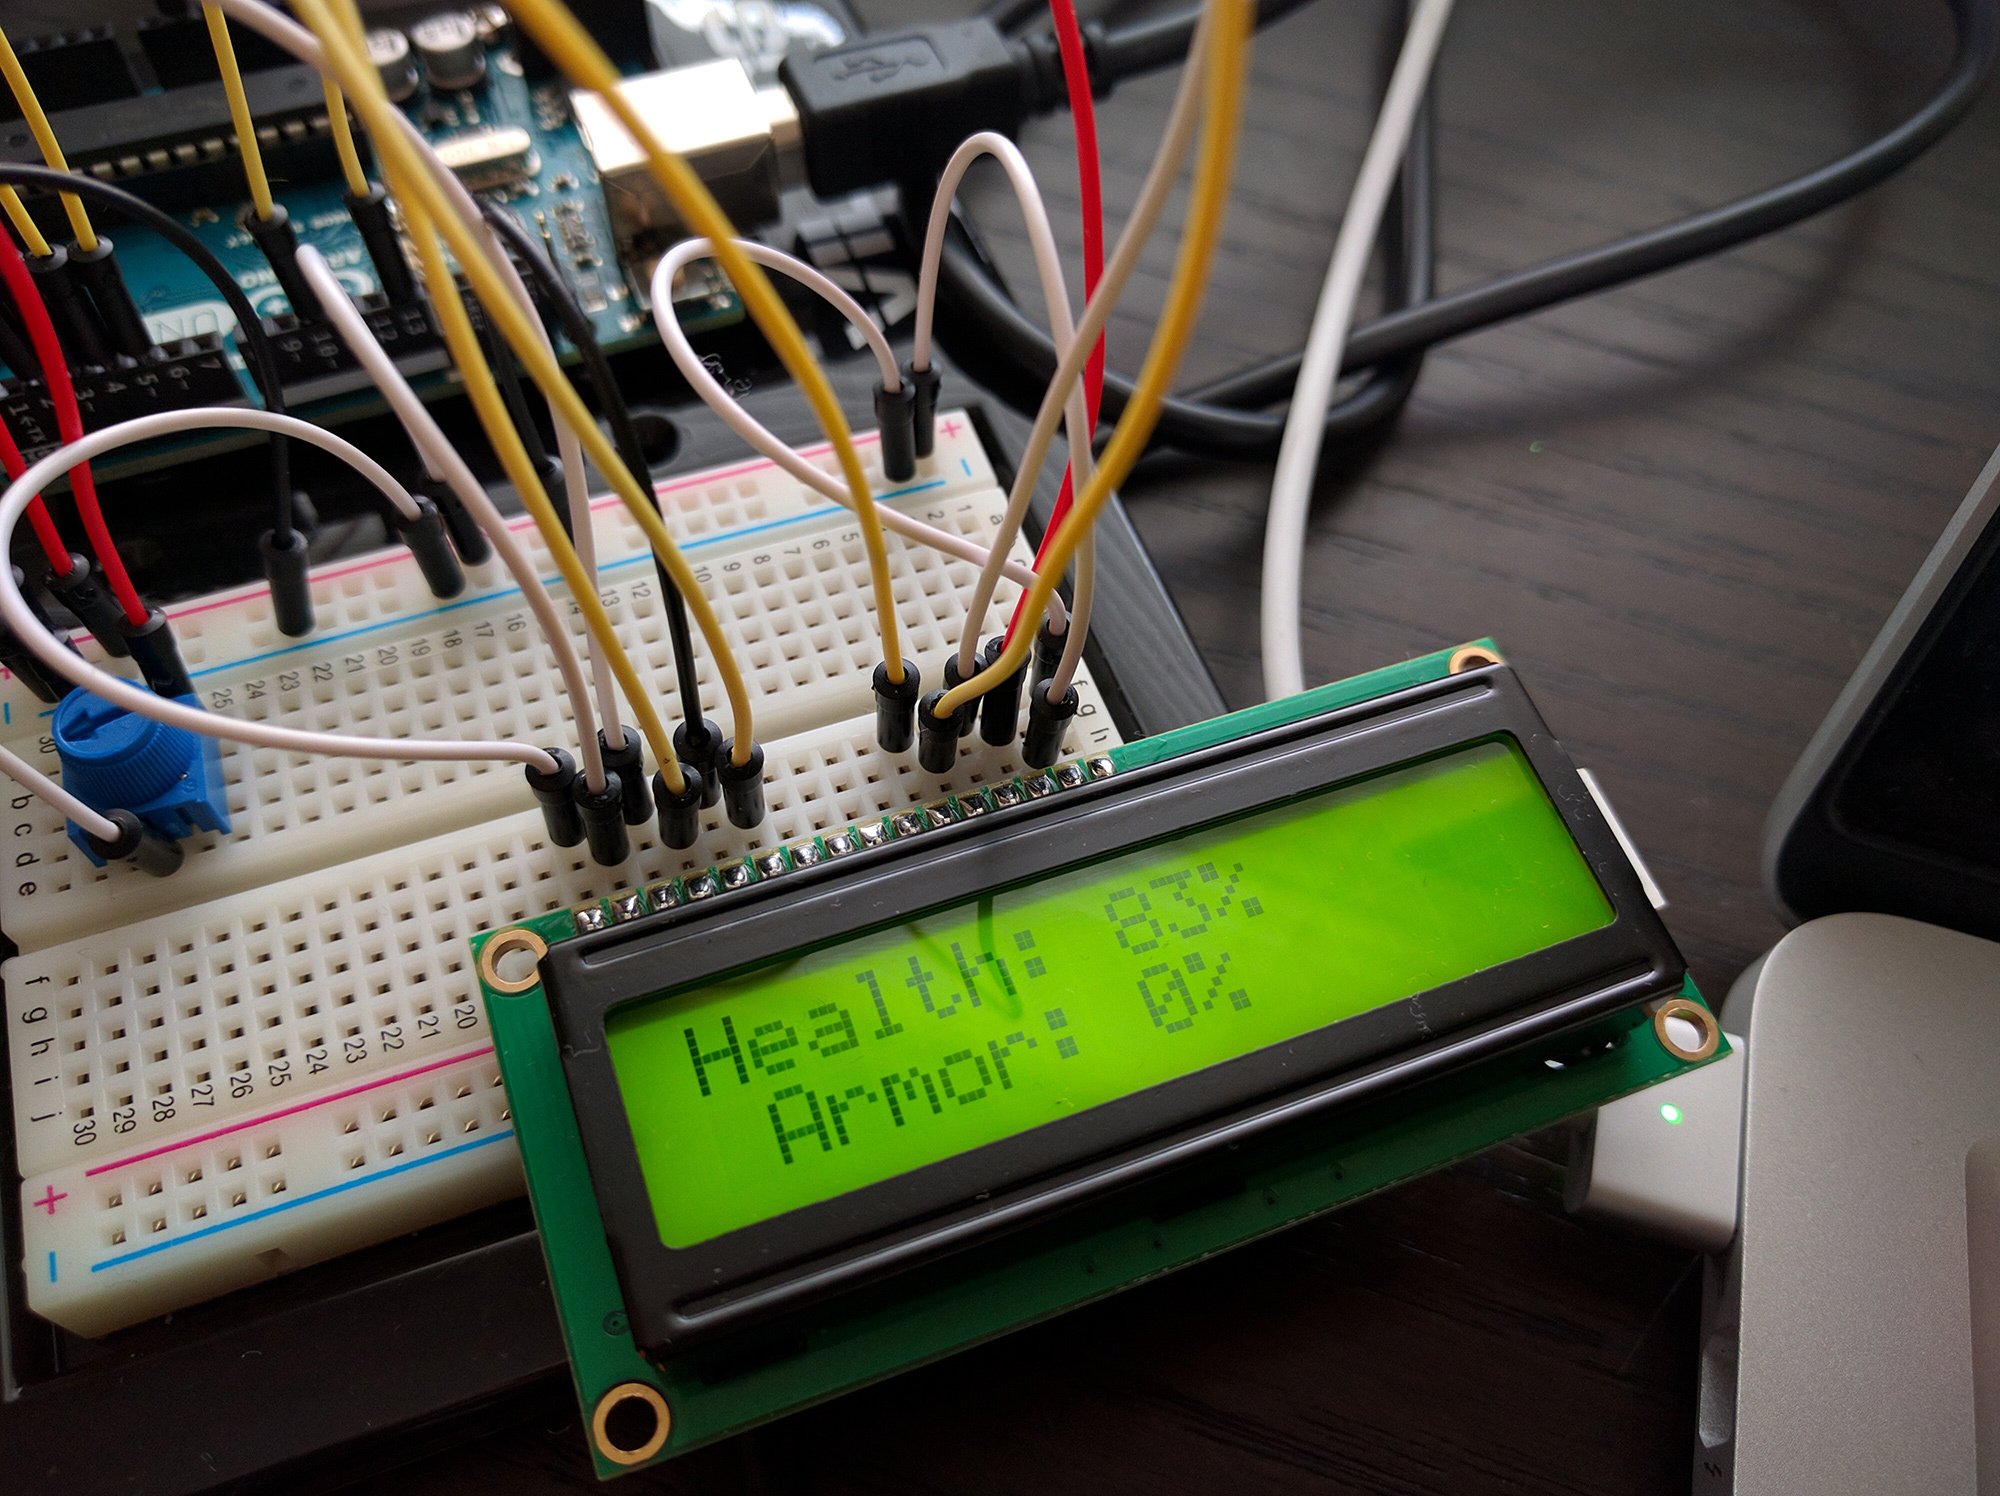
- Displays player health and armor percentage
- While driving
- Displays current vehicle name and speed (in format configured via ArduinoHUD.ini)
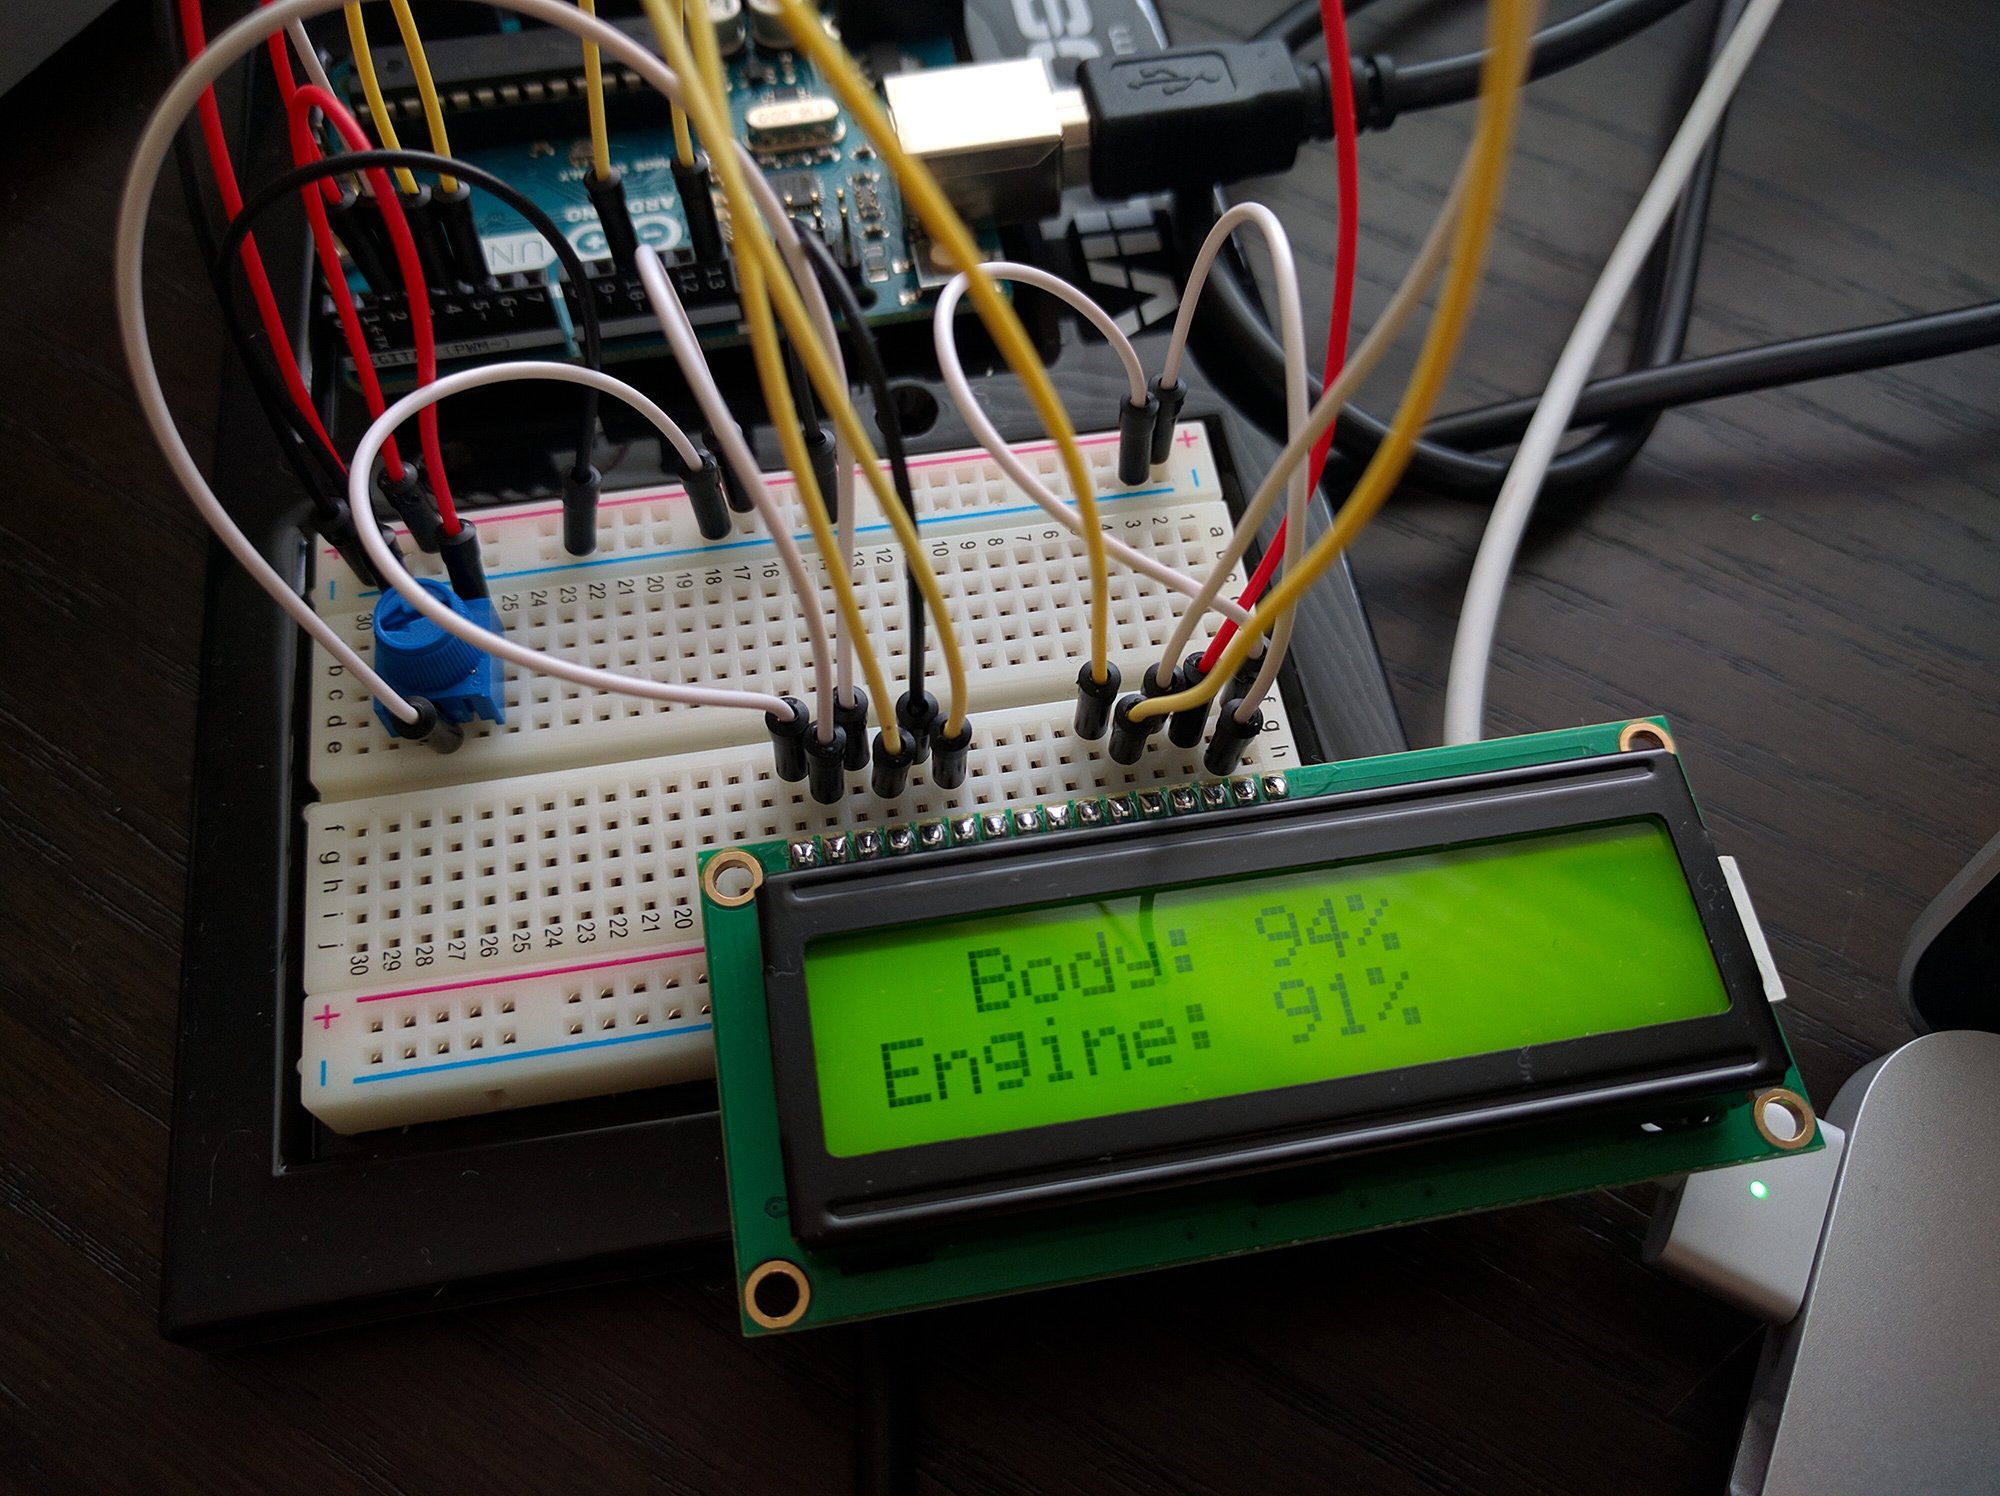
- Displays current vehicle body and engine health
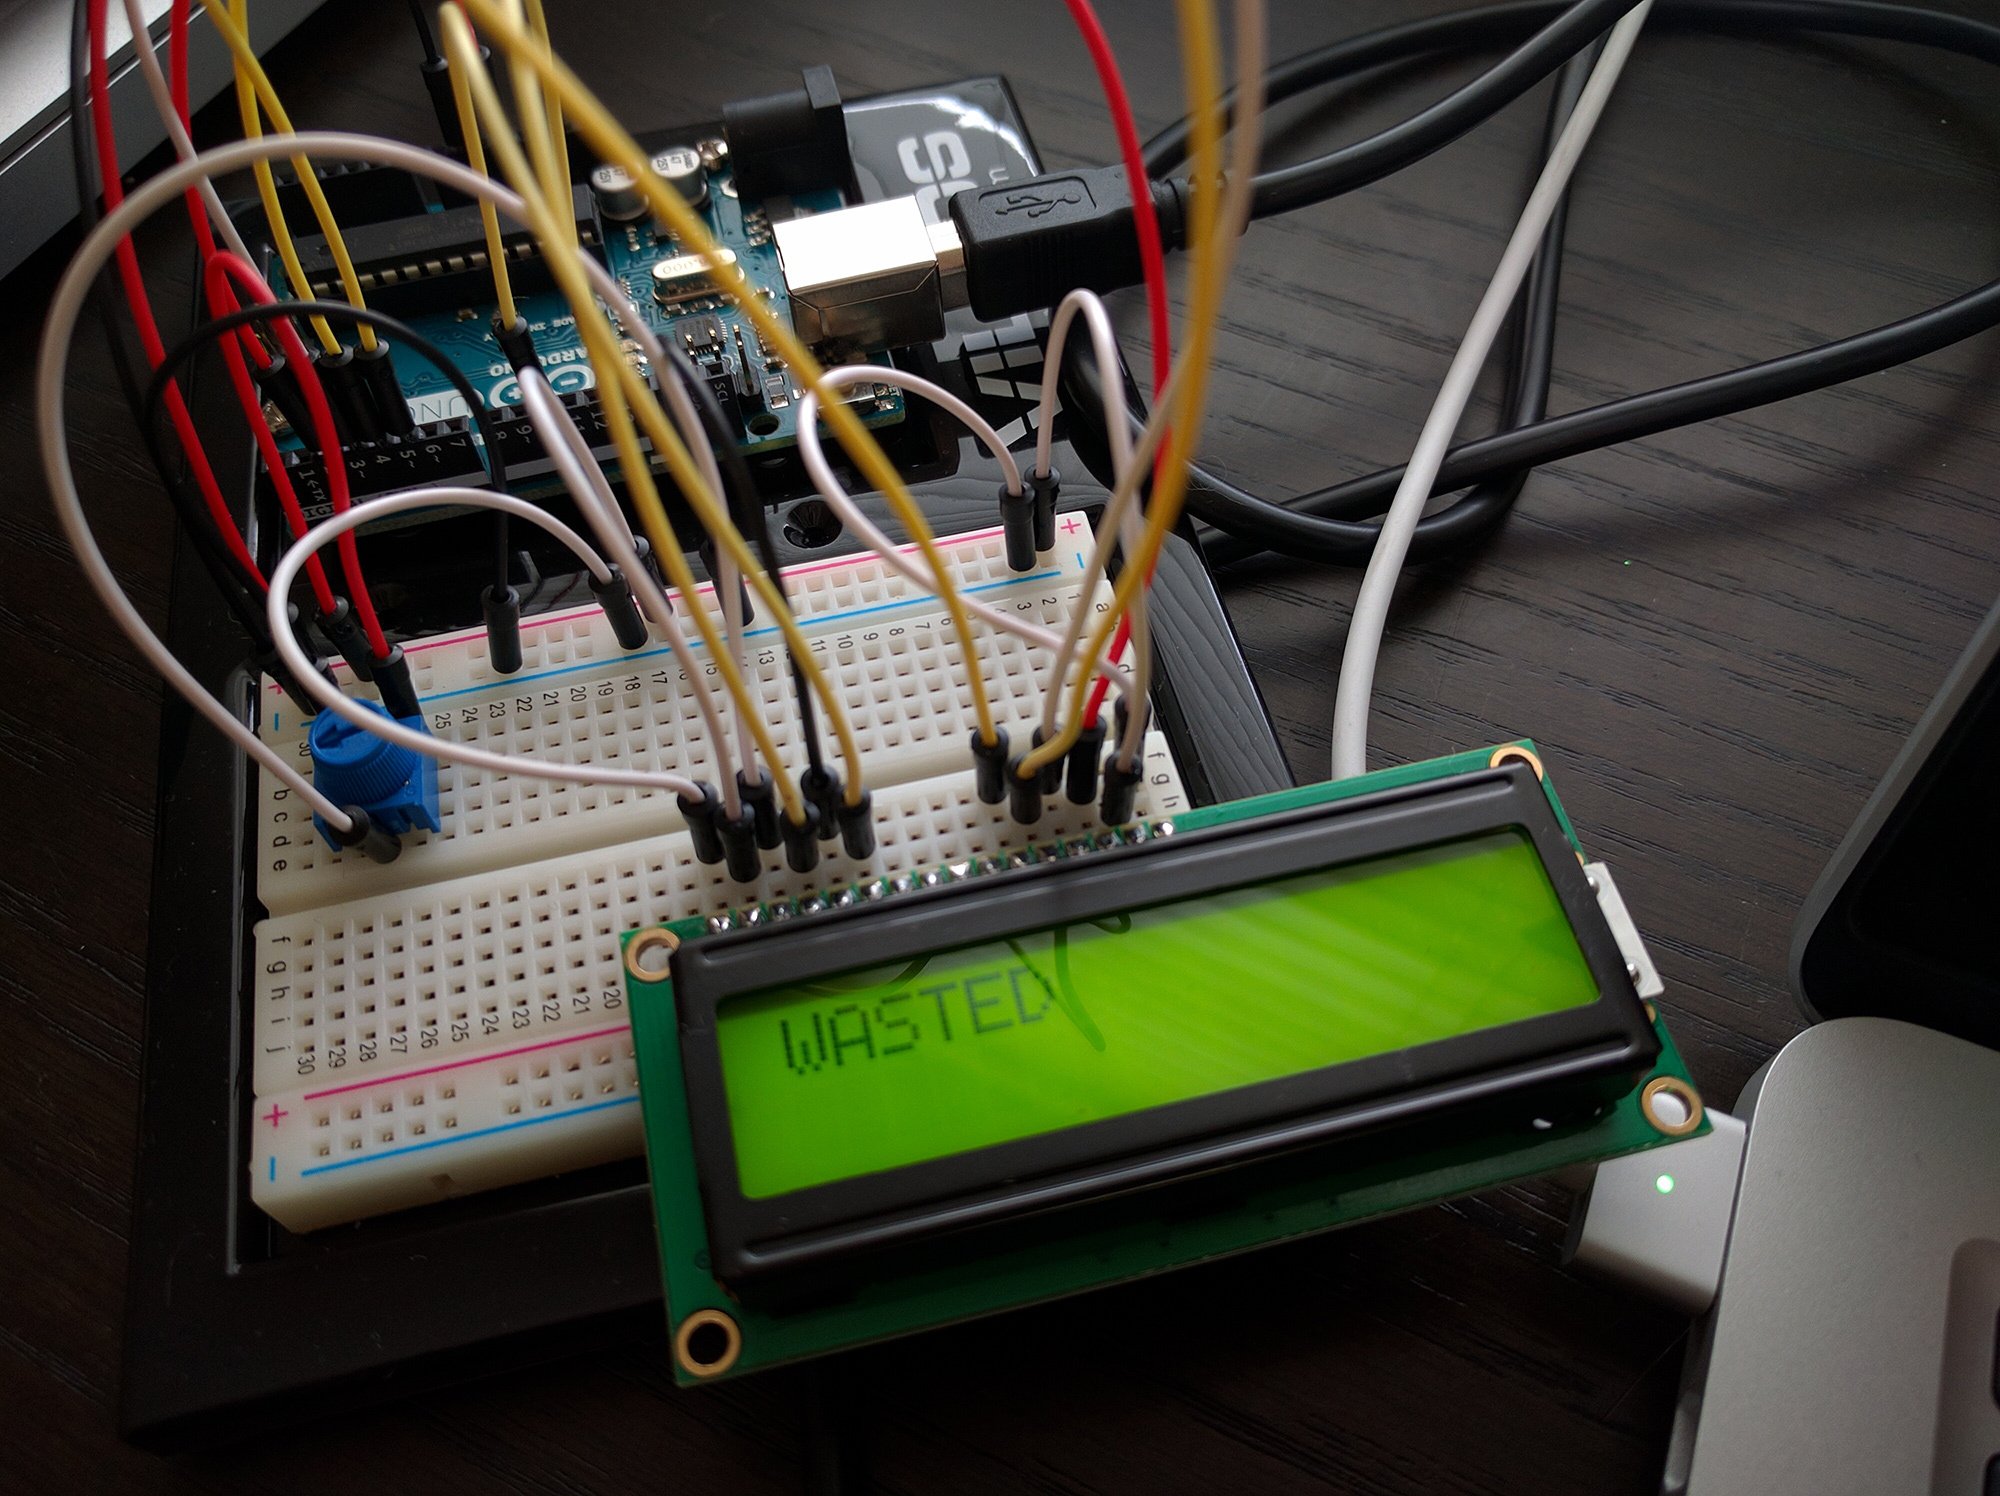
- Displays when player is dead
Installation
- Connect your LCD to your Arduino and test out its functions before installing the GTA script. If the "Hello World" tutorial is failing, then the script won't work. For installation help, visit: https://www.arduino.cc/en/Tutorial/HelloWorld.
- Open the ArduinoHUD.ino sketch in the Arduino app and make any necessary customizations
- If your pins differ from the defaults, be sure to edit the LiquidCrystal instantiator
- Update LCD_NUM_COLUMNS and LCD_NUM_ROWS to match your device
- If using LEDs, update the LED digital pins (LED1_PIN should be the right-most LED)
- If using a push button, update the push button digital pin
- Upload the sketch to your Arduino
- Install Community Script Hook V .NET v2.5.1
- Place ArduinoHUD.dll and ArduinoHUD.ini into your GTAVRoot/scripts folder (if the folder doesn't exist, create it)
- Open Arduino.ini in Notepad and edit your settings and preferences
- COMPort should match your Arduino's port name (you can find this in the Arduino app under Tools > Port)
- Edit HourFormat and SpeedFormat to your liking. Examples are given in the .ini file.
- Set ToggleFormat to "ARDUINO" only if you have set up a push button
- Play GTA V! No toggle key required.
Known Issues
- Minimum LCD column count is 12, and some screens may have weather text slightly cut off
License
The source code is available on GitHub, feel free to use it in any way you want: https://github.com/5mods/ArduinoHUD
Subido por primera vez: 11 de enero de 2016
Última actualización: 26 de enero de 2016
Descarga más reciente: hace 2 días
90 Comentarios
More mods by rappo:
ArduinoHUD turns your Arduino and LCD setup into an informational display that provides some data about your current gameplay.
Big thanks to ZyDevs for the inspiration and base sketch. Check out his script here.
Features
v3.0
v2.0
Installation
Known Issues
License
The source code is available on GitHub, feel free to use it in any way you want: https://github.com/5mods/ArduinoHUD
Big thanks to ZyDevs for the inspiration and base sketch. Check out his script here.
Features
v3.0
- Updated to use Script Hook V .NET v2.5.1. This is required, the script won't work without it.
- Fixed "BUSTED" display
- Refactored the way screens are cycled through, allowing for world/player information to display even while driving
- Added forced screen cycling via push button
- For help connecting your push button, use this tutorial: https://www.arduino.cc/en/tutorial/pushbutton
- Update the ArduinoHUD.ino sketch with your corresponding push button digital pin
- Update the ArduinoHUD.ini preferences file to set ToggleFormat to "ARDUINO" to disable the timed cycling
- For help connecting your push button, use this tutorial: https://www.arduino.cc/en/tutorial/pushbutton
v2.0
- Added wanted level display via five LEDs
- For help connecting your LEDs, use this tutorial: https://www.arduino.cc/en/Tutorial/Blink
- Update the ArduinoHUD.ino sketch with your corresponding LED digial pins (LED1_PIN should be the right-most LED)
- For help connecting your LEDs, use this tutorial: https://www.arduino.cc/en/Tutorial/Blink
- While walking
- Displays current time, weather and neighborhood
- Displays player health and armor percentage
- While driving
- Displays current vehicle name and speed (in format configured via ArduinoHUD.ini)
- Displays current vehicle body and engine health
- Displays when player is dead
Installation
- Connect your LCD to your Arduino and test out its functions before installing the GTA script. If the "Hello World" tutorial is failing, then the script won't work. For installation help, visit: https://www.arduino.cc/en/Tutorial/HelloWorld.
- Open the ArduinoHUD.ino sketch in the Arduino app and make any necessary customizations
- If your pins differ from the defaults, be sure to edit the LiquidCrystal instantiator
- Update LCD_NUM_COLUMNS and LCD_NUM_ROWS to match your device
- If using LEDs, update the LED digital pins (LED1_PIN should be the right-most LED)
- If using a push button, update the push button digital pin
- Upload the sketch to your Arduino
- Install Community Script Hook V .NET v2.5.1
- Place ArduinoHUD.dll and ArduinoHUD.ini into your GTAVRoot/scripts folder (if the folder doesn't exist, create it)
- Open Arduino.ini in Notepad and edit your settings and preferences
- COMPort should match your Arduino's port name (you can find this in the Arduino app under Tools > Port)
- Edit HourFormat and SpeedFormat to your liking. Examples are given in the .ini file.
- Set ToggleFormat to "ARDUINO" only if you have set up a push button
- Play GTA V! No toggle key required.
Known Issues
- Minimum LCD column count is 12, and some screens may have weather text slightly cut off
License
The source code is available on GitHub, feel free to use it in any way you want: https://github.com/5mods/ArduinoHUD
Subido por primera vez: 11 de enero de 2016
Última actualización: 26 de enero de 2016
Descarga más reciente: hace 2 días
 5mods on Discord
@rappo Oki!, Thanks
@rappo can please give me the link of the connectors/resistors?, i didn't find on the arduino store
@NicolasDomenic I just got them as part of the starter kit, but you can buy them from any electronics store. They're not specific to the Arduino. I'd suggest going to an electronics store and getting a set of standard resistors and connectors, they should have all kinds.
@rappo ok, thanks
@rappo the arduino is arrived to my country
@rappo u can please give me the list of what components you used for this mod?, Thank you very much
Hah, when I saw this, had no idea what Arduino was. Just started messing with it one year ago :B
@rappo after this happened with OpenIV, what Will happen with this site?
Sorry for my english :P
@rappo Wow, you're a Freak! ;)
@rappo i recommend u that in the map section put two sub sections, menyoo maps and map editor maps,because when i want to download a map i confuse
Sorry for my english, i'm argentinian so i speak spanish :P
@rappo can u please gimme a schema of connections so i test it? big thanks
@rappo This would work with rpi 3 too?
Great job bro!
@ Congratulation for 1000 Downloads :)
@NicolasDomenic mega
@Quasimodo ???
@rappo Hey man, just thought to say thanks for this. I never got chance to try the button mod as my graphics card fell over shortly after you updated it with the mutton mod I requested. I have shown a felloe maker person your efforts and they seem really intrigued by it. Thanks again :)
are you micheal reevs hmmmmmmmmmmmmmmmmmmmmmmmmmmmmm
What if you use your brain for lessons? Just kidding, really good project but I'm unable to do it :(
This idea is special. Really great!