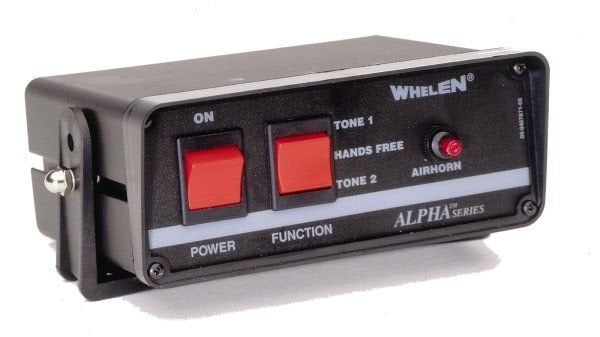
Whelen Alpha Siren (Ambulance Version)
3.476
26
3.476
26
Warning: There are reports that certain audio archives have been muted in game regardless of rather the sound mods were installed properly or not. To ensure that the audio archives for vehicles won't be muted in game make sure that the vehicle.oac file or the vehicle.awc file doesn't exceed over 15.75 MB in size (you can check the size of the vehicle.awc file in OpenIV under RESIDENT.rpf) and make sure that the siren sound audio files have the appropriate bitrate/sample-rate/etc (32000hz, 16bit mono, 512kbps) for the vehicles.awc file. Hopefully this will resolve the issues regarding muted sirens in game. If not then please let me know so I can farther troubleshoot this. Other than that, please enjoy this siren sound mod!
This is a Whelen Alpha siren sound mod to replace the ambulance sirens in the game.
Be sure to download the latest version of OpenIV and run it as administrator. Also be sure to backup your data before installing this siren mod.
1 – Run OpenIV, Select GTA V for Windows. However be sure to locate the folder where the game have been installed.
2 – Find audio file you want to edit by going into x64 folder
3 - Then click on audio folder where you should see one folder and two files.
4 - Click on the sfx folder and then select and click on the file: RESIDENT.rpf
5 - Upon opening the RESIDENT.rpf file, you should see 16 items shown. One of them is the vehicles.awc file.
6 - Right click on vehicles.awc and export to openFormats (.oac) to any folder you like (e.g downloads folder).
7 - Extract the vehicles folder from the .rar file to the same folder that was exported in.
8 – Afterwards, go to edit mode in OpenIV. There will be a warning upon editing mode so be careful.
9 - Import the .oac file by either draging the file to OpenIV or go to new and click on Import openFormats to select the .oac file then click on open.
10 - Click on ok
11 - Click on edit mode again (if you are in edit mode already) to exit edit mode.
12 - To ensure everything works, click on the vehicles.oac file twice and click on either 0x159C9182 or 0x161768E7 to see if the files were successfully replaced.
13 - Exit OpenIV and play GTA V.
Just in case that you might need better understanding on how to install and/or replace sounds using OpenIV, here's a video that will definitely help a lot better:
https://www.youtube.com/watch?v=ymLrNTjGBXA
If you have any questions regarding this siren mod please let me know in the comments below. I hope you all like this. =)
Tools Used:
AVS Audio Editor (for file conversion and sampling)
Audacity (for audio editing and tweaking)
Subido por primera vez: 19 de septiembre de 2015
Última actualización: 19 de septiembre de 2015
Descarga más reciente: hace 1 día
6 Comentarios
More mods by MrGhostman:
Warning: There are reports that certain audio archives have been muted in game regardless of rather the sound mods were installed properly or not. To ensure that the audio archives for vehicles won't be muted in game make sure that the vehicle.oac file or the vehicle.awc file doesn't exceed over 15.75 MB in size (you can check the size of the vehicle.awc file in OpenIV under RESIDENT.rpf) and make sure that the siren sound audio files have the appropriate bitrate/sample-rate/etc (32000hz, 16bit mono, 512kbps) for the vehicles.awc file. Hopefully this will resolve the issues regarding muted sirens in game. If not then please let me know so I can farther troubleshoot this. Other than that, please enjoy this siren sound mod!
This is a Whelen Alpha siren sound mod to replace the ambulance sirens in the game.
Be sure to download the latest version of OpenIV and run it as administrator. Also be sure to backup your data before installing this siren mod.
1 – Run OpenIV, Select GTA V for Windows. However be sure to locate the folder where the game have been installed.
2 – Find audio file you want to edit by going into x64 folder
3 - Then click on audio folder where you should see one folder and two files.
4 - Click on the sfx folder and then select and click on the file: RESIDENT.rpf
5 - Upon opening the RESIDENT.rpf file, you should see 16 items shown. One of them is the vehicles.awc file.
6 - Right click on vehicles.awc and export to openFormats (.oac) to any folder you like (e.g downloads folder).
7 - Extract the vehicles folder from the .rar file to the same folder that was exported in.
8 – Afterwards, go to edit mode in OpenIV. There will be a warning upon editing mode so be careful.
9 - Import the .oac file by either draging the file to OpenIV or go to new and click on Import openFormats to select the .oac file then click on open.
10 - Click on ok
11 - Click on edit mode again (if you are in edit mode already) to exit edit mode.
12 - To ensure everything works, click on the vehicles.oac file twice and click on either 0x159C9182 or 0x161768E7 to see if the files were successfully replaced.
13 - Exit OpenIV and play GTA V.
Just in case that you might need better understanding on how to install and/or replace sounds using OpenIV, here's a video that will definitely help a lot better:
https://www.youtube.com/watch?v=ymLrNTjGBXA
If you have any questions regarding this siren mod please let me know in the comments below. I hope you all like this. =)
Tools Used:
AVS Audio Editor (for file conversion and sampling)
Audacity (for audio editing and tweaking)
This is a Whelen Alpha siren sound mod to replace the ambulance sirens in the game.
Be sure to download the latest version of OpenIV and run it as administrator. Also be sure to backup your data before installing this siren mod.
1 – Run OpenIV, Select GTA V for Windows. However be sure to locate the folder where the game have been installed.
2 – Find audio file you want to edit by going into x64 folder
3 - Then click on audio folder where you should see one folder and two files.
4 - Click on the sfx folder and then select and click on the file: RESIDENT.rpf
5 - Upon opening the RESIDENT.rpf file, you should see 16 items shown. One of them is the vehicles.awc file.
6 - Right click on vehicles.awc and export to openFormats (.oac) to any folder you like (e.g downloads folder).
7 - Extract the vehicles folder from the .rar file to the same folder that was exported in.
8 – Afterwards, go to edit mode in OpenIV. There will be a warning upon editing mode so be careful.
9 - Import the .oac file by either draging the file to OpenIV or go to new and click on Import openFormats to select the .oac file then click on open.
10 - Click on ok
11 - Click on edit mode again (if you are in edit mode already) to exit edit mode.
12 - To ensure everything works, click on the vehicles.oac file twice and click on either 0x159C9182 or 0x161768E7 to see if the files were successfully replaced.
13 - Exit OpenIV and play GTA V.
Just in case that you might need better understanding on how to install and/or replace sounds using OpenIV, here's a video that will definitely help a lot better:
https://www.youtube.com/watch?v=ymLrNTjGBXA
If you have any questions regarding this siren mod please let me know in the comments below. I hope you all like this. =)
Tools Used:
AVS Audio Editor (for file conversion and sampling)
Audacity (for audio editing and tweaking)
Subido por primera vez: 19 de septiembre de 2015
Última actualización: 19 de septiembre de 2015
Descarga más reciente: hace 1 día


 5mods on Discord
Great Siren Ill deferentially use it thanks keep up the work
@tannertoby Thanks. =)
@MrGhostman
So why are there only two files when you show three different sirens? Isn't the faster low pitched siren changed, too?
And the main siren has a sound crackling in the first second (and no, that's not YT the .wav really has it)
Could you make this for Siren Mastery?
this for fivem?
Didnt work for me ..